

最近,很多人都比较关注SSL证书的申请与设置,云服务器网(yuntue.com)近期也为大家介绍了国内阿里云SSL证书申请流程及比较常用的安装配置SSL证书。
>>想设置https就需要安装SSL证书,点击进入阿里云申请SSL证书(2年仅567元)
希望,有需要的朋友能成功为自己的站点安装SSL证书。在这里为大家分享几种Nginx环境下强制http转https设置方法。
Nginx环境下强制http转https设置方法:
方法一:
下面代码照搬过去就行。无需做任何修改。春哥技术博客推荐此种方法,非常简单,改完以后实时生效,不用重启服务器。
if ($scheme = http ) {return 301 https://$host$request_uri;}
方法二:
下面代码照搬过去就行。无需做任何修改。
if ($server_port = 80 ) {return 301 https://$host$request_uri;}
方法三:
下列代码中请注意把域名修改成自己域名。
if ($ssl_protocol = “”) { return 301 https://$server_name$request_uri; }if ($host != www.yuntue.com) { return 301 $scheme://www.yuntue.com$request_uri; }
——————————http访问强制跳转到https—————————–
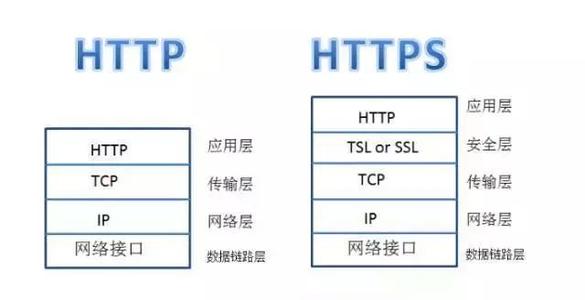
网站添加了https证书后,当http方式访问网站时就会报404错误,所以需要做http到https的强制跳转设置.
—————一、采用nginx的rewrite方法———————

1) 下面是将所有的http请求通过rewrite重写到https上。
    例如将所有的dev.wangshibo.com域名的http访问强制跳转到https。
    下面配置均可以实现:

配置1:
server {
    listen 80;
    server_name www.yuntue.com;
    index index.html index.php index.htm;

    access_log  /usr/local/nginx/logs/8080-access.log main;
    error_log  /usr/local/nginx/logs/8080-error.log;

    rewrite ^(.*)$  https://$host$1 permanent;        //这是ngixn早前的写法,现在还可以使用。

    location ~ / {
    root /var/www/html/8080;
    index index.html index.php index.htm;
    }
    }

-------------------------------------------------------
上面的跳转配置rewrite ^(.*)$  https://$host$1 permanent;
也可以改为下面
rewrite ^/(.*)$ http://www.yuntue.com/$1 permanent;
或者
rewrite ^ http://www.yuntue.com$request_uri? permanent;
-------------------------------------------------------

配置2:
server {
    listen 80;
    server_name www.yuntue.com;
    index index.html index.php index.htm;

    access_log  /usr/local/nginx/logs/8080-access.log main;
    error_log  /usr/local/nginx/logs/8080-error.log;

    return      301 https://$server_name$request_uri;      //这是nginx最新支持的写法

    location ~ / {
    root /var/www/html/8080;
    index index.html index.php index.htm;
    }
    }


配置3:这种方式适用于多域名的时候,即访问yuntue.com的http也会强制跳转到https://www.yuntue.com上面
server {
    listen 80;
    server_name www.yuntue.com yuntue.com *.yuntue.com;
    index index.html index.php index.htm;

    access_log  /usr/local/nginx/logs/8080-access.log main;
    error_log  /usr/local/nginx/logs/8080-error.log;

    if ($host ~* "^yuntue.com$") {
    rewrite ^/(.*)$ https://www.yuntue.com/ permanent;
    }

    location ~ / {
    root /var/www/html/8080;
    index index.html index.php index.htm;
    }
    }


配置4:下面是最简单的一种配置
server {
    listen 80;
    server_name www.yuntue.com;
    index index.html index.php index.htm;

    access_log  /usr/local/nginx/logs/8080-access.log main;
    error_log  /usr/local/nginx/logs/8080-error.log;

    if ($host = "www.yuntue.com") {
       rewrite ^/(.*)$ http://www.yuntue.com permanent;
    }

    location ~ / {
    root /var/www/html/8080;
    index index.html index.php index.htm;
    }
    }
—————二、采用nginx的497状态码———————
497 - normal request was sent to HTTPS
解释:当网站只允许https访问时,当用http访问时nginx会报出497错误码

思路:
利用error_page命令将497状态码的链接重定向到https://www.yuntue.com这个域名上

配置实例:
如下访问www.yuntue.com或者yuntue.com的http都会被强制跳转到https
server {
    listen 80;
    server_name www.yuntue.com yuntue.com *.yuntue.com;
    index index.html index.php index.htm;

    access_log  /usr/local/nginx/logs/8080-access.log main;
    error_log  /usr/local/nginx/logs/8080-error.log;

    error_page 497  https://$host$uri?$args;

    location ~ / {
    root /var/www/html/8080;
    index index.html index.php index.htm;
    }
    }


也可以将80和443的配置放在一起:
server {
    listen       127.0.0.1:443;  #ssl端口
    listen       127.0.0.1:80;   #用户习惯用http访问,加上80,后面通过497状态码让它自动跳到443端口
    server_name  www.yuntue.com;
    #为一个server{......}开启ssl支持
    ssl                  on;
    #指定PEM格式的证书文件
    ssl_certificate      /etc/nginx/wangshibo.pem;
    #指定PEM格式的私钥文件
    ssl_certificate_key  /etc/nginx/wangshibo.key;

    #让http请求重定向到https请求
    error_page 497  https://$host$uri?$args;

    location ~ / {
    root /var/www/html/8080;
    index index.html index.php index.htm;
    }
    }
—————三、利用meta的刷新作用将http跳转到https———————
上述的方法均会耗费服务器的资源,可以借鉴百度使用的方法:巧妙的利用meta的刷新作用,将http跳转到https
可以基于http://www.yuntue.com的虚拟主机路径下写一个index.html,内容就是http向https的跳转

将下面的内容追加到index.html首页文件内
[root@localhost ~]# cat /var/www/html/8080/index.html
<html>
<meta http-equiv="refresh" content="0;url=https://yuntue.com/">
</html>

[root@localhost ~]# cat /usr/local/nginx/conf/vhosts/test.conf
server {
    listen 80;
    server_name dev.wangshibo.com wangshibo.com *.wangshibo.com;
    index index.html index.php index.htm;

    access_log  /usr/local/nginx/logs/8080-access.log main;
    error_log  /usr/local/nginx/logs/8080-error.log;

    #将404的页面重定向到https的首页
    error_page  404 https://www.yuntue.com/;

    location ~ / {
    root /var/www/html/8080;
    index index.html index.php index.htm;
    }
    }
—————————————————————————————————————————–
下面是nginx反代tomcat,并且http强制跳转至https。
访问https://yuntue.com和访问http://172.29.34.33:8080/yuntue/结果是一样的
[root@BJLX_34_33_V vhosts]# cat zrx.conf
server {
    listen 80;
    server_name www.yuntue.com;
    index index.html index.php index.htm;

    access_log  logs/access.log;
    error_log   logs/error.log;

    return      301 https://$server_name$request_uri;

    location ~ / {
    root /data/nginx/html;
    index index.html index.php index.htm;
    }
    }


[root@BJLX_34_33_V vhosts]# cat ssl-zrx.conf
upstream tomcat8 {
    server 172.29.34.33:8080 max_fails=3 fail_timeout=30s;
}

server {
   listen 443;
   server_name www.yuntue.com;
   ssl on;

   ### SSL log files ###
   access_log logs/ssl-access.log;
   error_log logs/ssl-error.log;

### SSL cert files ###
   ssl_certificate ssl/wangshibo.cer;
   ssl_certificate_key ssl/wangshibo.key;
   ssl_session_timeout 5m;

   location / {
   proxy_pass http://tomcat8/yuntue/;
   proxy_next_upstream error timeout invalid_header http_500 http_502 http_503;
   proxy_set_header Host $host;
   proxy_set_header X-Real-IP $remote_addr;
   proxy_set_header X-Forwarded-For $proxy_add_x_forwarded_for;
   proxy_set_header X-Forwarded-Proto https;
   proxy_redirect off;
}
}
—————四、通过proxy_redirec方式———————
解决办法:
# re-write redirects to http as to https, example: /home
proxy_redirect http:// https://;
本文来源:yuntue.com/post/2706.html,若侵权,请联系删除。


评论前必须登录!
注册